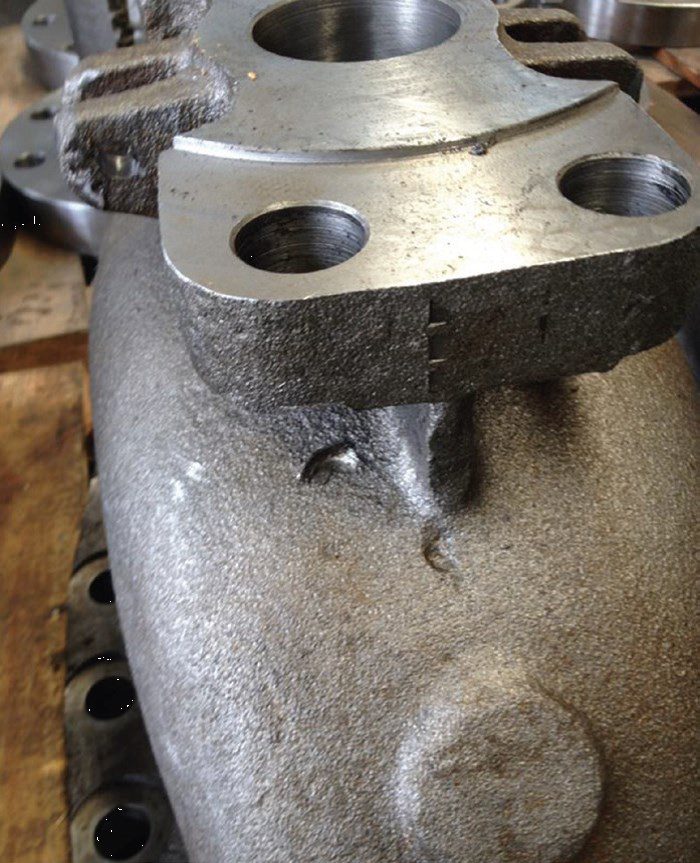
The MSS SP-55 Quality Standard for Steel Castings for Valves, Flanges, Fittings, and Other Piping Components is a visual method for evaluating surface irregularities. Originally adopted in 1961, it was developed to provide the industry with a uniform means for identifying various types of casting surface irregularities.


“There are many irregularities that can occur, which is why the standard is helpful. The purpose of MSS SP-55 is to help people identify the differences between acceptable and nonacceptable irregularities which are not exempted,” said Davis.
Types of surface irregularities are listed as follows:
1. Type I: Hot Tears & Cracks
Linear surface discontinuities or fractures caused by internal or external stresses.
2. Type II: Shrinkage
3. Type Ill: Sand Inclusions
Sand that becomes trapped in the molten metal and appears on the surface of the casting.
4. Type IV: Gas Porosity
Voids in the cast metal caused by entrapment of gas during solidification.
5. Type V: Veining
Features on the surface of the casting appear as a ridge, caused by movement or cracking of sand.
6. Type VI: Rat Tails
Features on the surface of the casting appear as a depression, caused by faulting or buckling of the mold surfaces.
7. Type VII: Wrinkles, Laps, Folds & Coldshuts
Irregularities in casting surfaces from incomplete fusing or by folding of molten metal surfaces.
8. Type VIII: Cutting Marks
9. Type IX: Scabs
10. Type X: Chaplets
Chaplets found on the surface of casting indicating incomplete fusion, which can apply to internal chills.
11. Type XI: Weld Repair Areas
Improper surface preparation evident after welding.
12. Type XII: Surface Roughness

As mentioned earlier, for each type of inclusion or irregularity, there are reference pictures to help decide what is acceptable and what is not. “You have to build components considering this standard, and it should be incorporated into a manufacturer’s inspection process. As part of our overall quality management system, we have a checklist in which our inspectors must check off they have conducted a visual inspection as per MSS SP-55 on every component that goes through our system. It is inherently part of what we do,” said O’Quinn.
In the hydrocarbon industry, many valves and other piping components found in refineries and chemical plants are utilized in very volatile and dangerous situations, often under high pressures. Under no circumstances unacceptable irregularities should be found once the valve is subject to such elevated pressures and/or high/low temperatures, but unfortunately this is sometimes the case, if proper care is not taken. “The importance of having good quality castings is something everyone should understand and should know how to identify a good quality casting which is why MSS SP-55 is crucial,” said Davis.
At ISV, application of the MSS SP-55 standard is enforced not only on incoming cast on the receiving dock, but throughout production, including machining, painting, and shipping. It is never too late to identify a problematic valve before it is shipped to the customer. ISV is ultimately responsible for quality of the product thus they uphold stringent quality control inspection and testing processes to assure flawless products for its customers. A very tightly controlled group of casting and other material suppliers makes this possible in addition to regularly auditing the foundries to assure optimal output of components. “All of the material we received from foundries are thoroughly inspected and evaluated. As a rule, visual inspection referencing MSS SP-55 is always part of the receiving inspection for goods and parts. Valve assemblers at ISV are trained specifically on MSS SP-55, therefore they also recognize any irregularities in materials. Even after assembly, each valve is subject to extensive testing and final inspections, including various Non-Destructive Testing (NDT) which include the MSS SP-55 inspection awareness in these processes as well. There should be 100% implementation of MSS SP55 in the valve manufacturing processes, period,” said O’Quinn.
“Starting at the foundry, every stage of the manufacturing process and supply chain should have the MSS SP-55 reference guides readily available. Unfortunately, mistakes happen which could lead to catastrophic failure. In the manufacturing process, many times defects get overlooked because of lack of knowledge, training, or awareness. Having reference pictures will provide team members who is working a casting or finished product to potentially spot something irregular. Team members may not know immediately how to identify or what the irregularity is; however, they have a quick reference to quickly detect possible defects. Minimally, this can identify possible defects that need to be investigated further,” said Davis.
“If a world with castings free of defects is not possible, the next best thing is a world full of people capable of recognizing such defects. It is an easy and cost-effective inspection to employ. It is universally accepted and among valve manufacturers. We want to bring awareness to industry participants on how important this standard is and how they can satisfy a level of visual inspection utilizing the MSS SP-55 standard. Casting is an art. This standard helps to identify casting irregularities,” said O’Quinn.
In addition, Edward L. Haile and Associates provides a comprehensive, interactive awareness training class based of off MSS SP-55 and other inputs. The classes are designed for companies to educate their team members on understanding the importance of identifying such casting irregularities, provide hands on training with real-life samples, understand the safety and risk factors which goes along with not identifying defects; ultimately helping team members understand “there are lives at the end of the product you are producing,” said Davis.
References
1. International Standard Valve, https://www.isvalve.com/
2. Edward L. Haile and Associates, https://elhaile.com/


